Bitrix24 Integration
What the AI can do
Summary
Bitrix24 Integration connects Bitrix24 (CRM and business management platform) with Newo Platform.
It enables:
- Checking calendar availability for appointments
- Creating bookings as calendar events with contact linking
- Cancelling appointments by deleting calendar events
- Automatic deal creation at conversation end with employee load balancing
- Creating leads in Bitrix24 CRM
- Creating tasks with LLM-powered payload extraction
- Contact lookup and auto-creation across all flows
- Employee workload balancing for deal assignment
This integration is designed for service businesses and teams who use Bitrix24 as their CRM and need automated scheduling, lead management, and task creation through a conversational AI agent (voice or chat).
Common use cases
- When a client asks about availability → Query Bitrix24 calendar events and compute free slots
- When a client wants to book → Find or create contact, create calendar event
- When a client wants to cancel → Delete calendar event from Bitrix24
- When a conversation ends → Auto-create deal assigned to the least busy employee
- When a lead arrives (e.g., from Yelp) → Create lead in Bitrix24 CRM
- When a client requests a task → LLM extracts details, creates task in Bitrix24
Features at a glance
| Feature | Supported | Notes |
|---|---|---|
| Check Availability | ✅ | Calendar-based slot computation with working hours |
| Book Appointment | ✅ | Calendar event with CRM contact link |
| Cancel Appointment | ✅ | Deletes calendar event |
| Deal Creation | ✅ | Auto on session end with employee load balancing |
| Lead Creation | ✅ | From Yelp leads or webhook |
| Task Creation | ✅ | LLM-powered payload extraction from conversation |
| Contact Management | ✅ | Lookup by phone, auto-create if missing |
| Employee Load Balancing | ✅ | Assigns deals to employee with fewest open deals |
| Working Hours Detection | ✅ | Fetched from Bitrix24 calendar settings |
| Availability Preload | ✅ | Optional check on conversation start |
| Reschedule | ❌ | Cancel + rebook as workaround |
| Multi-Calendar Support | ❌ | Single owner calendar per integration |
Before You Start
Before installation:
- Active Bitrix24 account (cloud or on-premise)
- Bitrix24 OAuth App with Client ID and Client Secret
- Calendar configured for the owner user (typically admin, ID=1)
Setup
Create the Newo project
If this project already exists in Newo Builder, skip this subsection and continue with the integration-specific settings below.
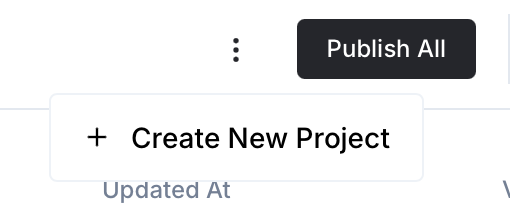
- In Newo Builder, open the projects list and click Create Project (or Create New Project from the top-right menu).
- Fill IDN and Title. The exact names do not matter; use any clear names your team will recognize.
- In Registry, choose the release channel:
- staging — the newest module fixes appear here first. Use it when you need the latest fix, but expect possible unfinished changes.
- production — the final stable version for live projects.
- In Module, select the module for this integration.
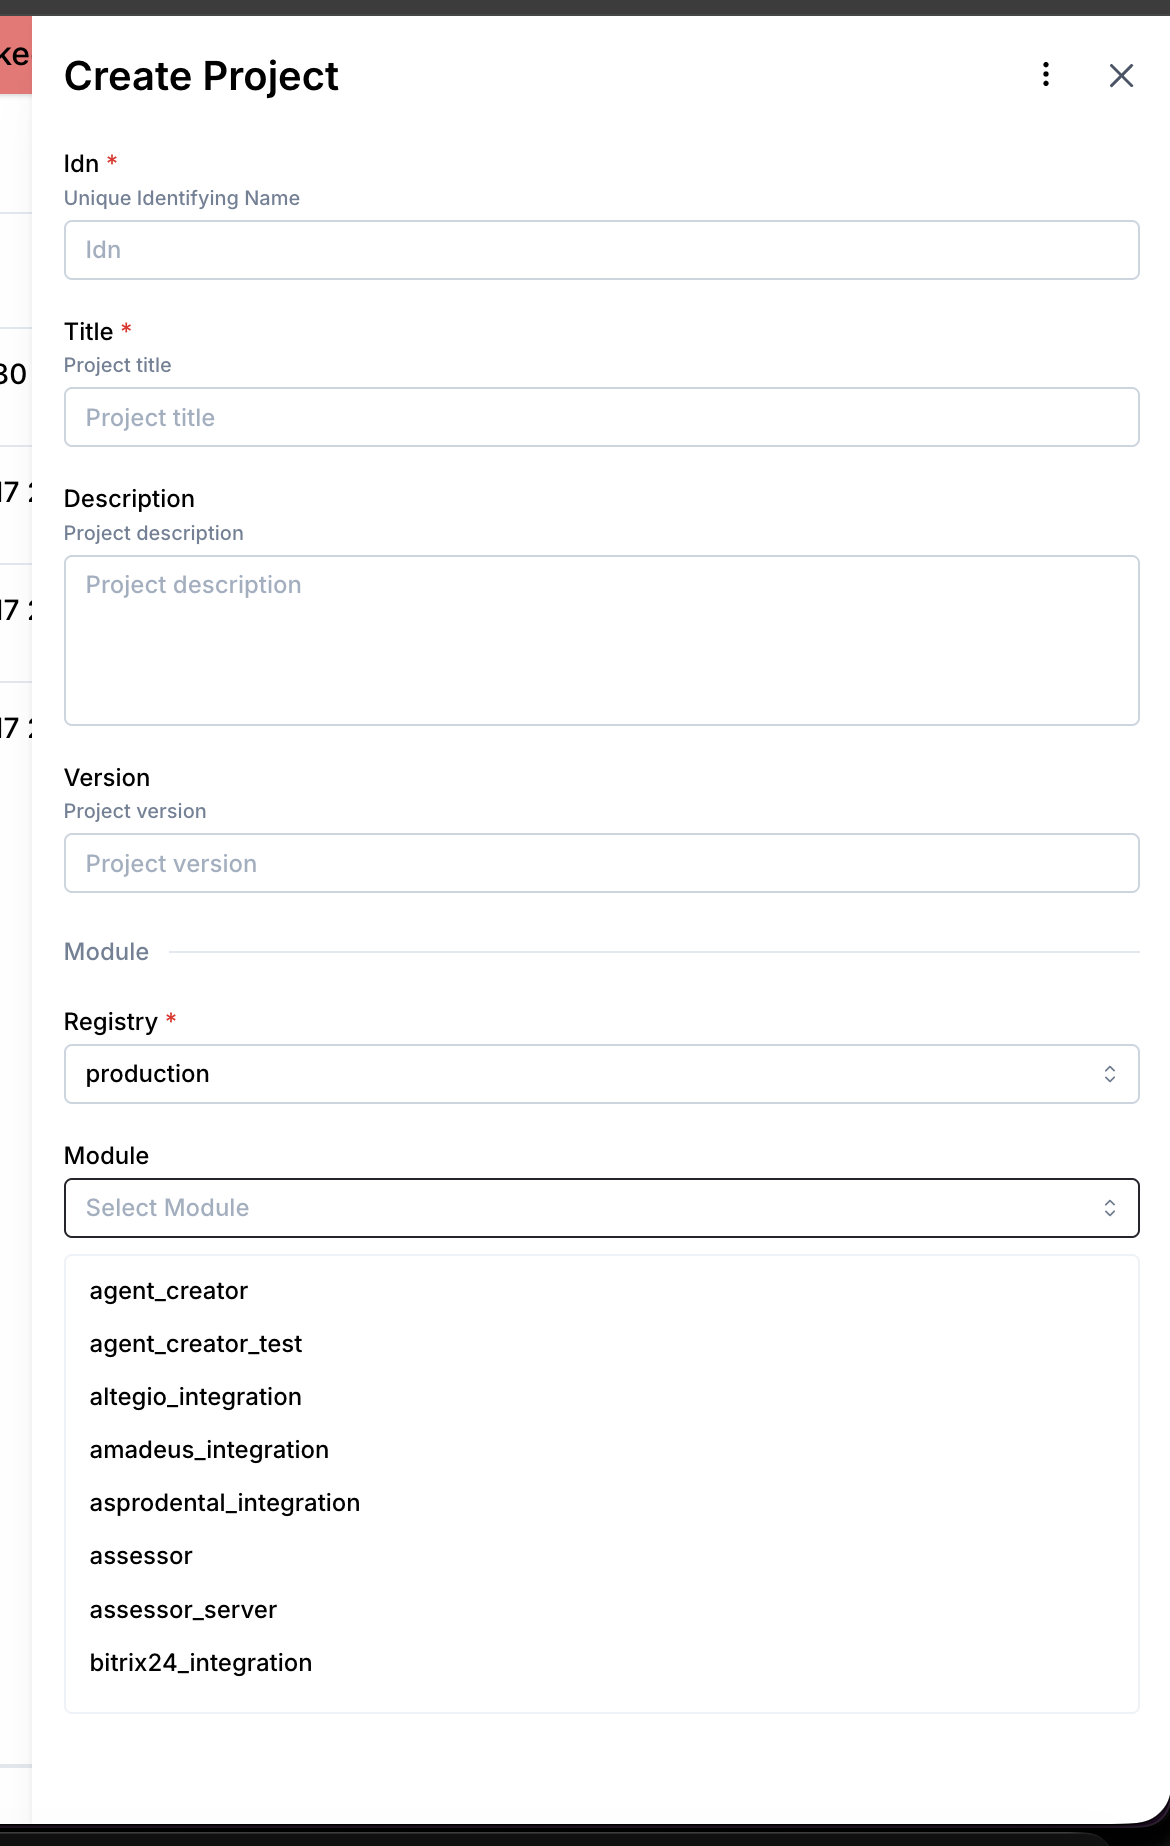 5. Leave Module version on Latest version unless support tells you to pin a specific version, then click Create.
3.1 Step 1 — Authorize in Bitrix24
- In Newo platform, set
bitrix_base_url,bitrix_client_id, andbitrix_client_secret - Click the Bitrix24 authorization link provided by the platform
- Log in to your Bitrix24 account
- Authorize the Newo app
- Copy the authorization code from the redirect URL
- Paste the code into the
bitrix_oauth_codeattribute
3.2 Step 2 — Connect in Platform
- Open Newo → Projects
- Set the following attributes in Builder / Attributes:
| Attribute | Required | Description |
|---|---|---|
bitrix_base_url | ✅ | Bitrix24 instance URL (e.g., https://yourcompany.bitrix24.com) |
bitrix_client_id | ✅ | OAuth App ID |
bitrix_client_secret | ✅ | OAuth App Secret |
bitrix_oauth_code | ✅ | One-time OAuth authorization code |
bitrix_owner_id | ❌ | Calendar owner ID (default: 1) |
bitrix_duration | ❌ | Slot duration in minutes (default: 60) |
bitrix_availability_days | ❌ | Days ahead for availability (default: 1) |
bitrix_employee_position_name | ❌ | Employee position filter for deal assignment (default: cleaner) |
bitrix_create_deal_on_conversation_end | ❌ | Auto-create deal on session end (default: True) |
bitrix_check_availability_on_conversation_start | ❌ | Preload availability on start (default: False) |
bitrix_enable_slot_check | ❌ | Enable availability checking (default: True) |
bitrix_enable_booking | ❌ | Enable booking (default: True) |
bitrix_enable_cancellation | ❌ | Enable cancellation (default: True) |
bitrix_enable_task_creation | ❌ | Enable task creation (default: True) |
bitrix_enable_lead_creation | ❌ | Enable lead creation (default: True) |
- Click Save + Publish All
- On publish, the SetupFlow automatically:
- Exchanges the OAuth code for access and refresh tokens
- Fetches working hours from Bitrix24 calendar settings
- Prepares the connections for API and token operations
- Registers the task creation tool with the agent
- Injects booking and availability payload schemas
How to use the integration
4.1 How the Integration Works
The integration uses Bitrix24's REST API for calendar events, contacts, deals, leads, tasks, and user management. Availability is computed from calendar events. Deals are auto-created at session end with intelligent employee assignment.
- A Trigger is a system event that starts a flow
- An Action is the API operation performed in Bitrix24
Where to test
Testing can be done through the Newo conversation interface (chat or voice). Major flows (availability, booking, cancellation, lead, task) have dedicated webhook test endpoints.
How to test that everything works
To test the integration:
- Setup: Publish and verify OAuth token exchange + working hours fetch
- Availability: Ask about open slots — verify calendar events are queried and free times computed
- Booking: Complete a booking — verify calendar event created in Bitrix24 with contact link
- Cancellation: Cancel a booking — verify calendar event deleted
- Deal: End a conversation after booking — verify deal created and assigned to least busy employee
- Task: Ask agent to create a task — verify task appears in Bitrix24 with contact link
If no action occurs:
- Ensure OAuth credentials are set (
bitrix_base_url,bitrix_client_id,bitrix_client_secret) - Verify
bitrix_access_tokenwas obtained - Confirm
bitrix_owner_idpoints to a valid user with a calendar - Check feature flags are enabled for the desired operations
- Verify
bitrix_employee_position_namematches actual employee positions (for deal assignment) - Re-publish the project if credentials were changed
Note: This integration creates real records in Bitrix24. Calendar events, deals, leads, tasks, and contacts are reflected in the live CRM.
FAQ
Q: How does employee load balancing work for deals?
A: When a deal is created at session end, the integration fetches all active employees matching bitrix_employee_position_name, counts their open deals (stage=NEW), and assigns the new deal to the employee with the fewest deals.
Q: What is the difference between deals, leads, and tasks? A: Deals are auto-created when a conversation ends (if a booking was made) — they represent a business opportunity with employee assignment. Leads are created from external sources (e.g., Yelp) as initial contact records. Tasks are created on demand from conversation context with LLM-extracted details.
Q: How is availability computed?
A: The integration queries the calendar owner's events for the date range, then generates time slots at bitrix_duration intervals (default: 60 min), removing slots that overlap with existing events.
Q: Can I connect to an on-premise Bitrix24?
A: Yes. Set bitrix_base_url to your on-premise instance URL. The OAuth token endpoint remains at https://oauth.bitrix.info/oauth/token/ for all Bitrix24 installations.
Q: How does the token refresh work?
A: On HTTP 401 responses, the integration automatically refreshes the token via https://oauth.bitrix.info/oauth/token/ with the stored refresh token. A separate connection (bitrix_token_connector) handles token operations.
Q: What information does the LLM extract for tasks?
A: Gemini 2.5 Flash extracts firstName, lastName, phoneNumber (E.164 format), and taskTitle (max 10 words) from the conversation memory. If last name is not available, the first name is copied.
Q: Can I disable deal creation at session end?
A: Yes. Set bitrix_create_deal_on_conversation_end to False. This disables the DealFinalizationFlow entirely.