Repcard CRM Integration
What the AI can do
Summary
Repcard CRM Integration connects Repcard CRM (field sales CRM for solar, home services, and insurance) with Newo Platform.
It enables:
- Creating appointments in Repcard with customer details, address, and calendar selection
- Cancelling existing appointments by updating their status
- Checking availability by computing free 30-minute slots from existing appointments
- Creating contacts (customers) in Repcard with type, owner, and status assignment
- Sending digital business cards (RepCards) to contacts via SMS or email
- Dynamic calendar synchronization from the Repcard API at setup
- DevMode for testing without real API credentials (LLM-emulated responses)
- Auto-configuring conversation canvas with booking and cancellation scenarios
This integration is designed for field sales teams (solar installers, home services providers, insurance agents) who use Repcard CRM to manage their leads and appointments and need an AI receptionist to book, cancel, and check availability through voice or chat.
Common use cases
- When a caller requests an appointment --> Agent collects details (name, phone, email, address, date/time) and creates an appointment in Repcard
- When a caller wants to cancel an appointment --> Agent finds the booking and cancels it in Repcard
- When a caller asks about availability --> Agent fetches existing appointments and computes free 30-minute slots over the next 5 days
- When a contact needs to be created --> Agent collects customer info and creates a contact in Repcard via create/update request
- When a digital business card needs to be sent --> Agent sends a RepCard to a contact via SMS or email
- When the project is published --> Agent syncs available calendars from Repcard API and populates the calendar dropdown
Features at a glance
| Feature | Supported | Notes |
|---|---|---|
| Create Appointment | Yes | Full customer details, address, calendar selection, setter email |
| Cancel Appointment | Yes | the update request with cancellation notes |
| Check Availability | Yes | Computes free 30-min slots from existing appointments (5-day window) |
| Create Contact | Yes | create/update request with type, owner, status |
| Send RepCard | Yes | create/update request (digital business card via SMS/email) |
| Calendar Sync | Yes | Dynamic sync from lookup request on publish |
| Canvas Auto-Setup | Yes | Booking + cancellation scenarios and intents |
| DevMode (LLM Emulation) | Yes | Test without real API -- LLM generates realistic responses |
| Reschedule | No | Cancel + rebook as workaround |
| Existing Client Lookup | No | Not implemented |
Before You Start
Before installation:
- Active Repcard CRM Enterprise account with API access
- API Key from Repcard Company Settings > API Keys tab
- At least one calendar configured in Repcard
- A setter (sales rep) email address for appointment assignment
- A contact owner email for contact creation
Setup
Create the Newo project
If this project already exists in Newo Builder, skip this subsection and continue with the integration-specific settings below.
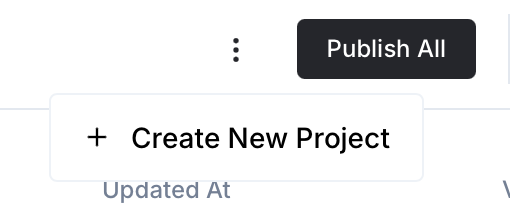
- In Newo Builder, open the projects list and click Create Project (or Create New Project from the top-right menu).
- Fill IDN and Title. The exact names do not matter; use any clear names your team will recognize.
- In Registry, choose the release channel:
- staging — the newest module fixes appear here first. Use it when you need the latest fix, but expect possible unfinished changes.
- production — the final stable version for live projects.
- In Module, select the module for this integration.
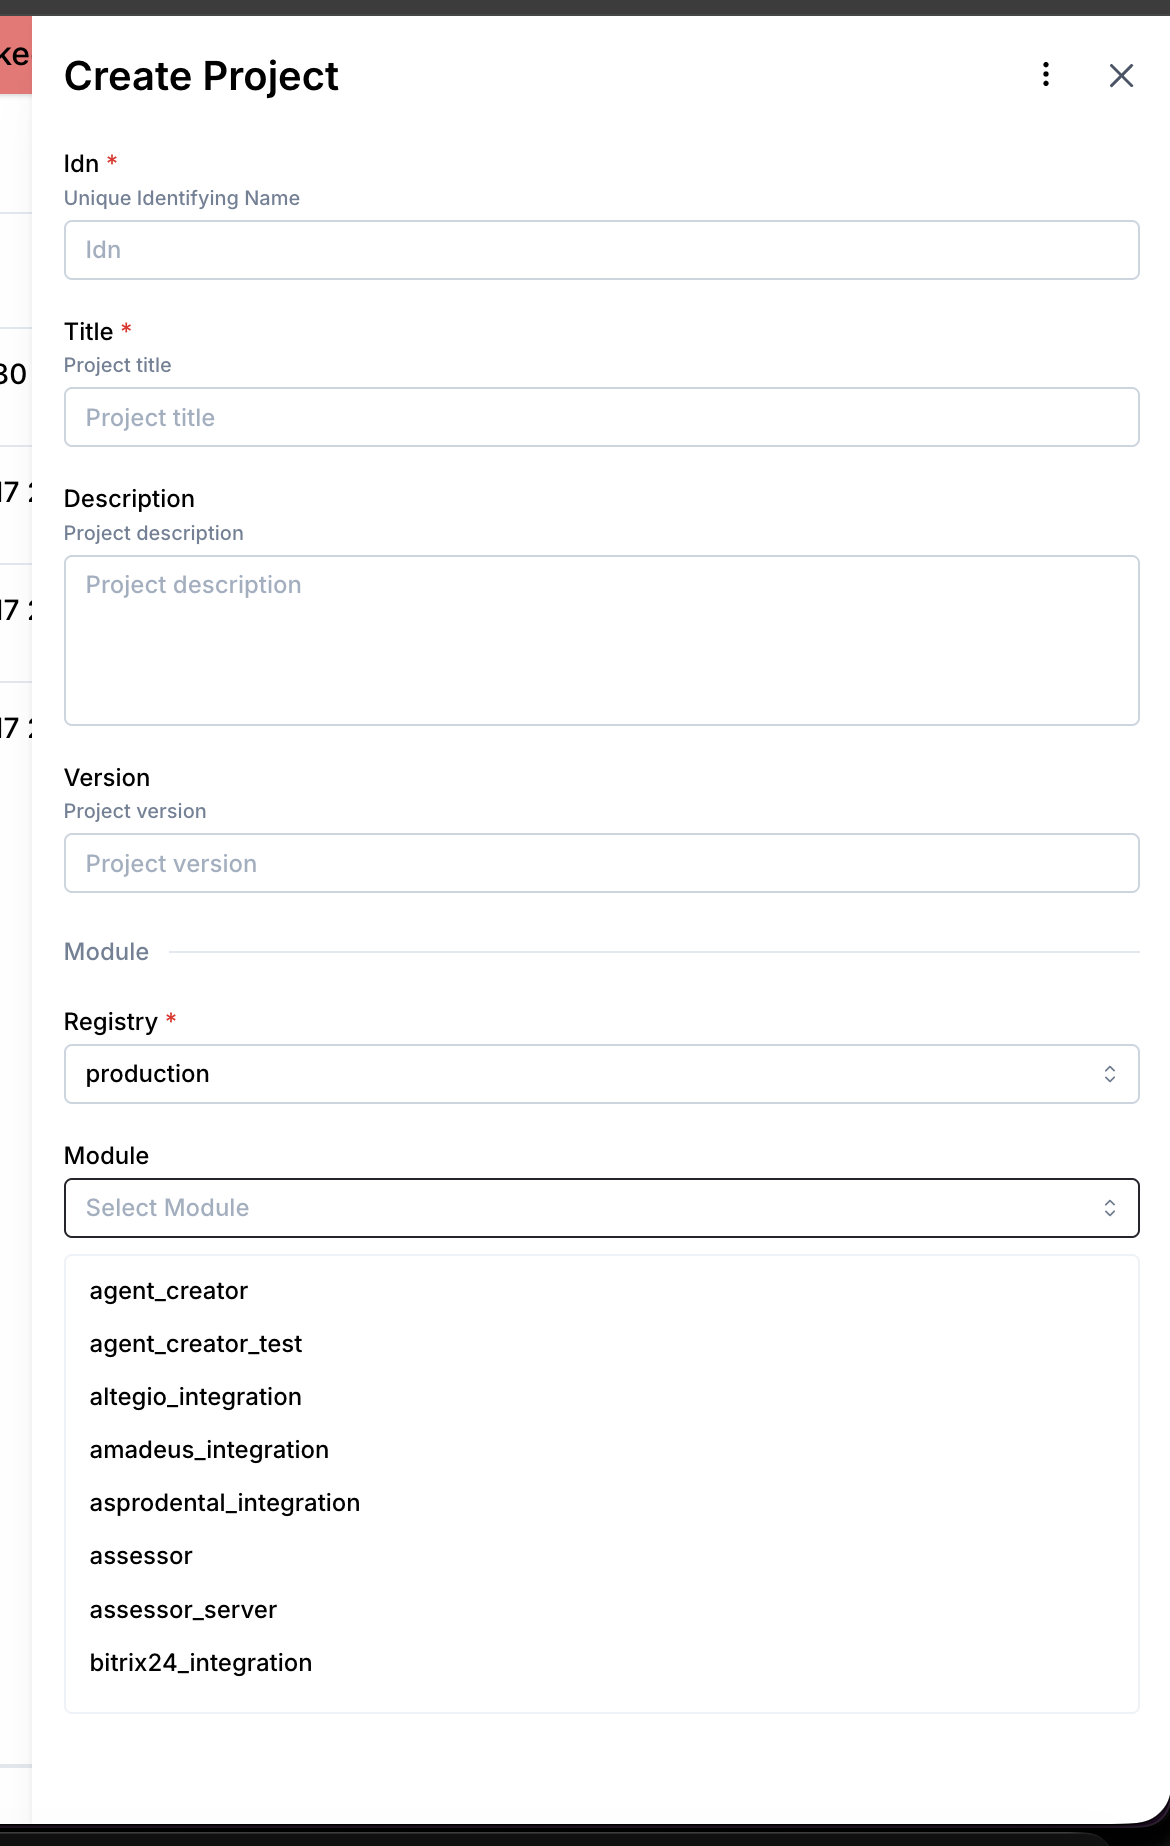 5. Leave Module version on Latest version unless support tells you to pin a specific version, then click Create.
3.1 Step 1 -- Get API Credentials from Repcard CRM
- Log in to your Repcard CRM account
- Navigate to Company Settings > API Keys tab
- Generate or copy your API Key
- Note: API access requires an Enterprise account
- Note your Calendar IDs (these will be synced automatically on publish)
- Note the setter email address for appointment assignment
3.2 Step 2 -- Connect in Platform
- Open Newo --> Projects
- Set the following attributes in Builder / Attributes:
| Attribute | Required | Default | Description |
|---|---|---|---|
repcard_api_key | Yes | -- | API Key from Repcard Company Settings > API Keys tab |
repcard_base_url | No | https://api.repcard.com | API base URL |
repcard_mode | No | Production | Production for real API, DevMode for LLM emulation |
repcard_enable_booking | No | True | Enable appointment creation |
repcard_enable_cancellation | No | True | Enable appointment cancellation |
repcard_enable_contact_creation | No | True | Enable contact creation |
repcard_enable_send_repcard | No | True | Enable sending digital business cards |
repcard_default_calendar | No | (auto-synced) | Calendar ID for new appointments (dropdown populated after sync) |
repcard_default_setter | Yes* | -- | Setter (sales rep) email for new appointments |
repcard_default_contact_type | No | Lead | Contact type for new contacts (Lead, Customer, Recruit) |
repcard_default_contact_owner | Yes* | -- | Owner (assigned rep) email for new contacts |
repcard_default_contact_status | No | New | Status for new contacts |
repcard_default_repcard_id | No | -- | Digital business card template ID |
repcard_setup_scenarios | No | True | Auto-add booking/cancellation scenarios to canvas |
*Required for the respective feature to work (booking requires setter, contacts require owner).
- Click Save + Publish All
- On publish, the InitFlow automatically:
- Prepares the connection for Repcard API (
repcard_connector) - Sets all customer attributes with metadata
- Registers booking, availability, and cancellation tools on ConvoAgent
- Syncs calendars from Repcard API (lookup request)
- Populates the calendar dropdown with synced values
- Prepares the connection for Repcard API (
How to use the integration
4.1 How the Integration Works
The integration uses a Repcard API key. In production, customer actions are written to Repcard CRM; in demo mode, the agent can be tested without touching live Repcard records.
Canvas scenarios
When repcard_setup_scenarios is True (default), Publish All automatically adds:
Scenarios:
- "Scheduling Appointment via Agent" (
repcard_schedule_appointment_via_agent_scenario) -- 10-step guided booking flow that collects all required fields (name, phone, email, address, ZIP, date/time) with code-phrases - "Canceling Appointment via Agent" (
cancellation_via_agent_scenario) -- 6-step cancellation flow with confirmation and code-phrases
Intent Types:
- "[L] Appointment via Agent" (
library_intent_types_common_appointment_agent) -- from library - "[T] Cancellation via Agent" (
cancellation_via_agent_intent) -- caller wants to cancel
Where to test
Testing can be done through the Newo conversation interface (chat or voice).
DevMode: Set repcard_mode to DevMode to test without real API credentials. The integration will use LLM to generate realistic Repcard API responses.
How to test that everything works
To test the integration:
- Setup: Publish the project and verify calendar sync completed (check
repcard_calendarsattribute andrepcard_default_calendardropdown) - Availability: Ask about available times -- verify agent returns computed free slots
- Booking: Request an appointment -- provide name, phone, email, address, and date --> verify appointment created in Repcard
- Cancellation: Ask to cancel -- verify appointment status updated in Repcard
- Contact Creation: Trigger contact creation -- verify customer created in Repcard via create/update request
If no action occurs:
- Ensure API key is set (
repcard_api_key) -- requires Enterprise account - Verify
repcard_modeisProduction(notDevMode) - Check feature flags (
repcard_enable_booking,repcard_enable_cancellation, etc.) - Confirm
repcard_default_setteris set (required for booking) - Confirm
repcard_default_contact_owneris set (required for contacts) - Verify calendars synced (check
repcard_default_calendardropdown) - Re-publish after configuration changes
Note: This integration creates real appointments and contacts in Repcard CRM. Changes made through the agent are reflected in the live system.
FAQ
Q: How does authentication work?
A: Repcard uses an API Key sent in the x-api-key HTTP header. API access requires an Enterprise-tier Repcard CRM account. The key is obtained from Company Settings > API Keys tab.
Q: What is DevMode?
A: When repcard_mode is set to DevMode, the integration uses LLM (Gen) to emulate Repcard API responses instead of making real HTTP requests. Useful for testing the booking flow without creating real appointments.
Q: How does calendar selection work?
A: On publish, the integration calls the lookup request to fetch all active calendars. These are stored in repcard_calendars and populate the repcard_default_calendar dropdown. The LLM can also select a calendarId from the enum in the booking schema. If no calendar is selected, the default is used.
**Q: Why is the customers endpoint create/update request and not create/update request
A: Repcard CRM uses /customers as the endpoint name for creating contacts. This is the official Repcard API convention despite the feature being called "contact creation" in the integration.
Q: How does availability checking work? A: The integration fetches all existing appointments for the next 5 days via the lookup request, then computes free 30-minute slots during business hours (9:00 AM to 5:00 PM) by excluding busy time slots. Past slots are also excluded. Up to 20 available slots are returned.
Q: What DateTime format does the API use?
A: The Repcard API uses YYYY-MM-DD HH:MM:SS format. The integration automatically appends :00 seconds if the input is in YYYY-MM-DD HH:MM format (16 characters).
Q: How does the calendarId work?
A: The calendarId is numeric and identifies a calendar in Repcard CRM. It is synced dynamically from the API. The setterEmail identifies the sales representative assigned to the appointment.
Q: Can I use the Send RepCard feature through the conversational agent?
A: The Send RepCard feature (the create/update request) is primarily designed for Zapier-style automation triggers. It requires a contact_id and a repcard_default_repcard_id template to be configured.