XCALLY Integration
How to Setup
Create the Newo project
If this project already exists in Newo Builder, skip this subsection and continue with the integration-specific settings below.
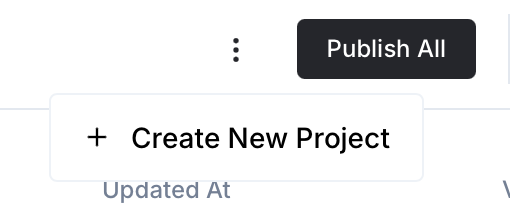
- In Newo Builder, open the projects list and click Create Project (or Create New Project from the top-right menu).
- Fill IDN and Title. The exact names do not matter; use any clear names your team will recognize.
- In Registry, choose the release channel:
- staging — the newest module fixes appear here first. Use it when you need the latest fix, but expect possible unfinished changes.
- production — the final stable version for live projects.
- In Module, select the module for this integration.
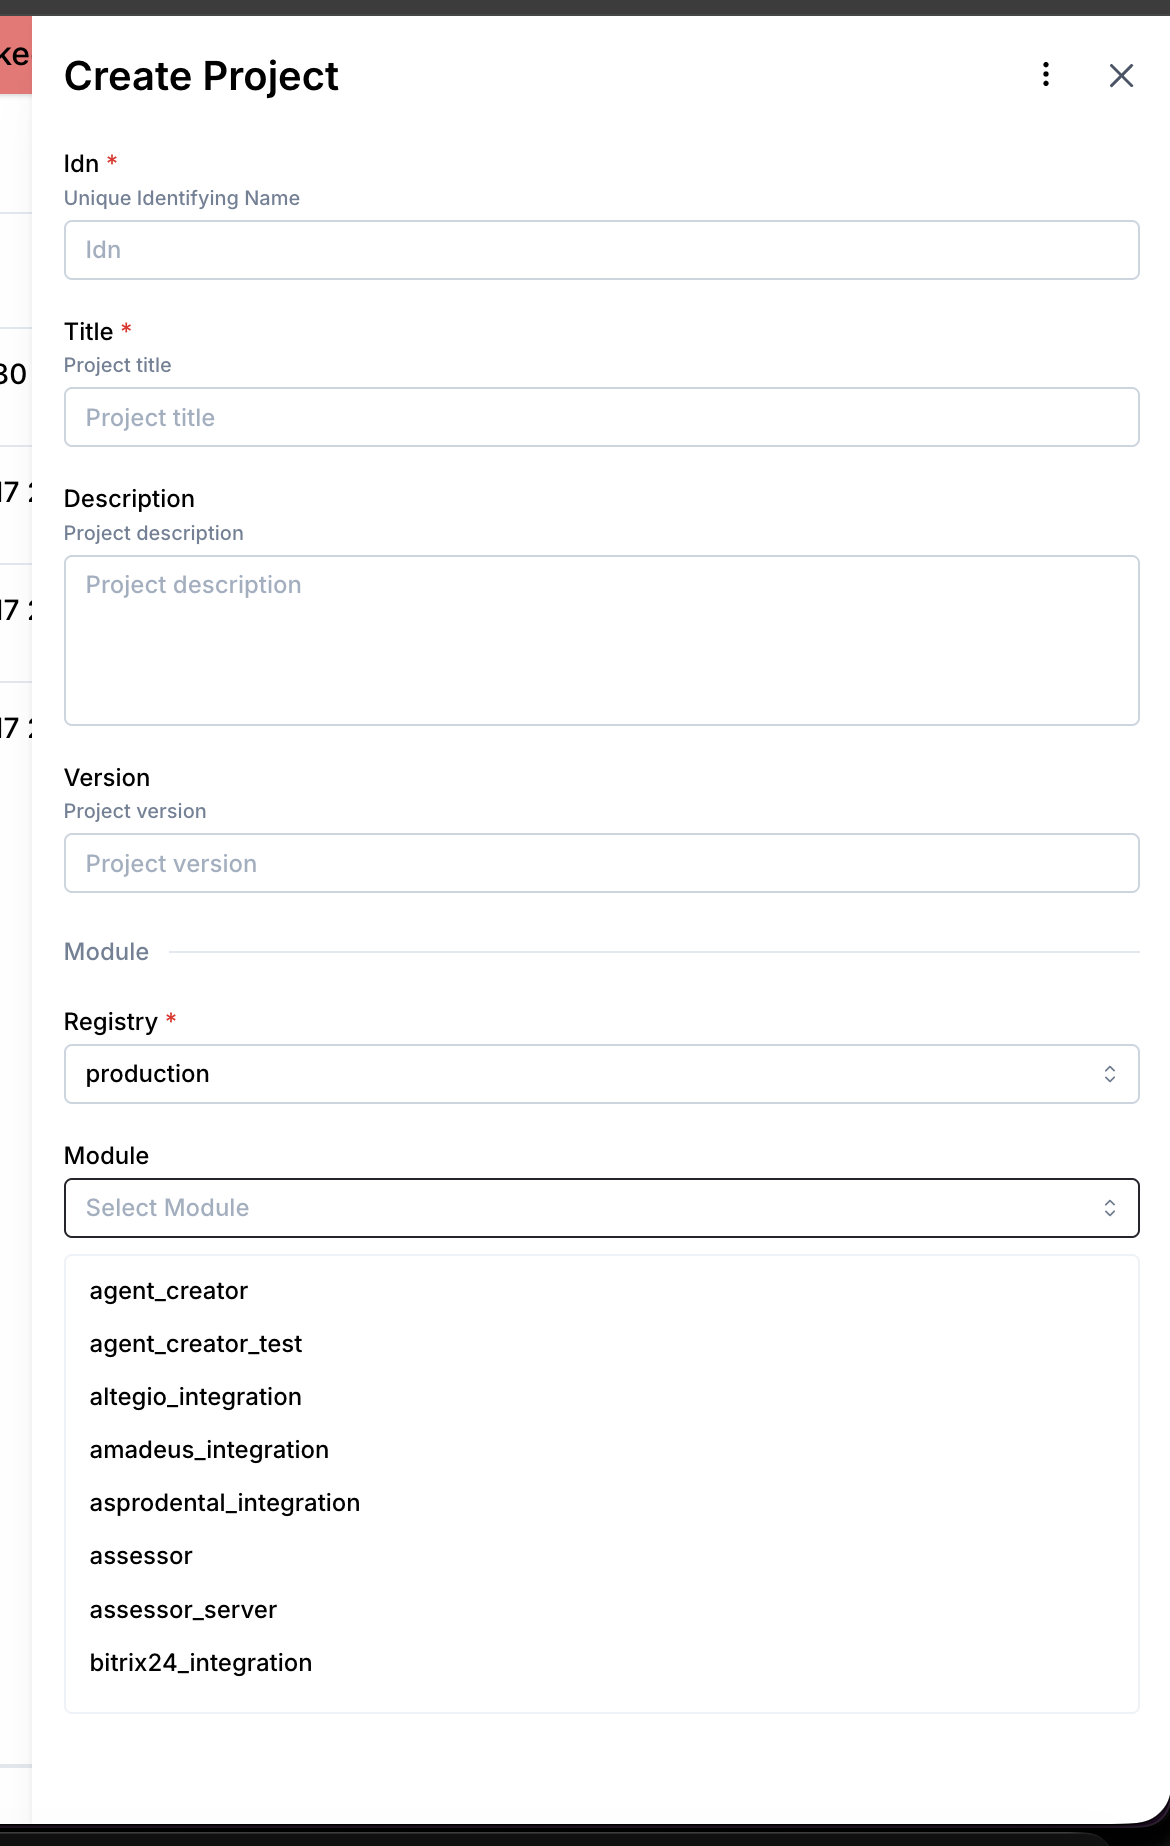 5. Leave Module version on Latest version unless support tells you to pin a specific version, then click Create.
Fill Newo XCALLY Settings
Fill every field in the XCally Module group in Newo Builder.
Use these values:
| Field | Value |
|---|---|
XCALLY API Key | XCALLY API key / JWT |
XCALLY Base URL | https://demo5.csc.ee/api |
XCALLY Open Channel Account ID | 9 |
XCALLY Default Contact List ID | 73 |
Return AI After Operator Closes Dialog | True |
XCALLY Automatically Add Default Scenarios to Canvas | True |
Important:
- Base URL must end with
/api - Base URL must not end with
/ - The contact list must belong to the same XCALLY Open Channel account
XCALLY Incoming Webhook URLis generated automatically on publish and stored in a hidden field- The XCALLY setup creates its own Newo Chat connector:
xcally_proxy_chat
Quick check:
| Check | Expected |
|---|---|
| API key | Not empty |
| Base URL | Ends with /api |
| Account ID | Number |
| Contact list ID | Number |
| Return AI after close | True |
| Auto scenarios | True |
Publish and Verify XCALLY Account Settings
Click Publish All in Newo Builder.
After publishing, XCALLY Integration creates and starts a dedicated Newo Chat connector named xcally_proxy_chat.
This is the chat connector that supports XCALLY live-agent handoff.

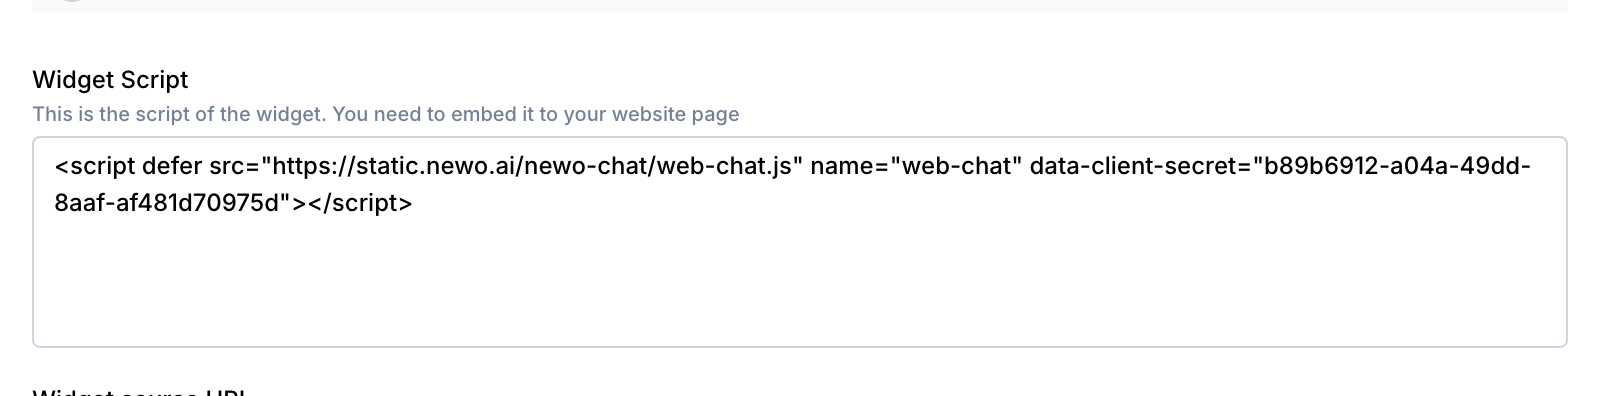
If you want to use a website chat with XCALLY support, use the widget script from xcally_proxy_chat.
Do not use the default newo_chat widget for XCALLY handoff tests: regular newo_chat messages are ignored by the XCALLY bridge.
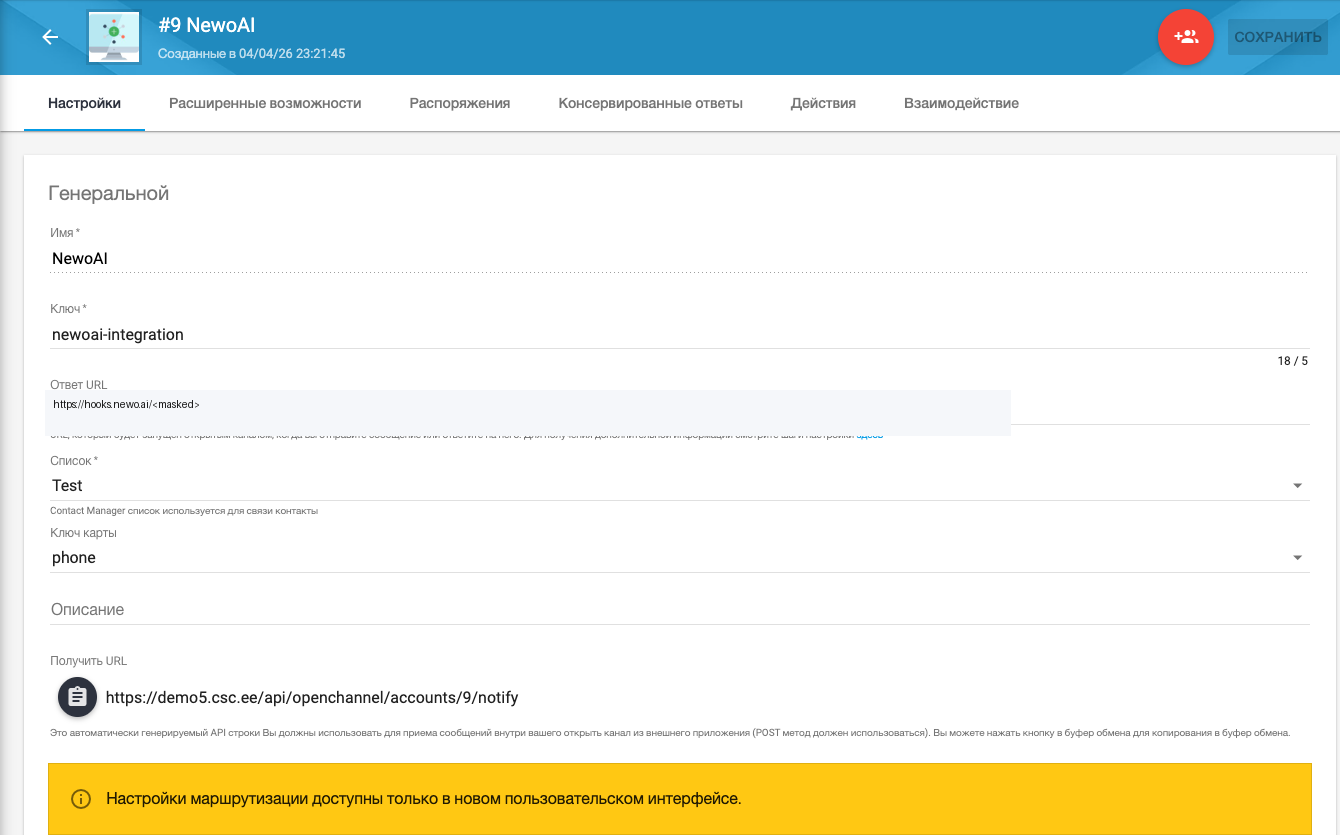
After publishing, open XCALLY and go to Channels -> Open Channel.
Find the account with ID 9.
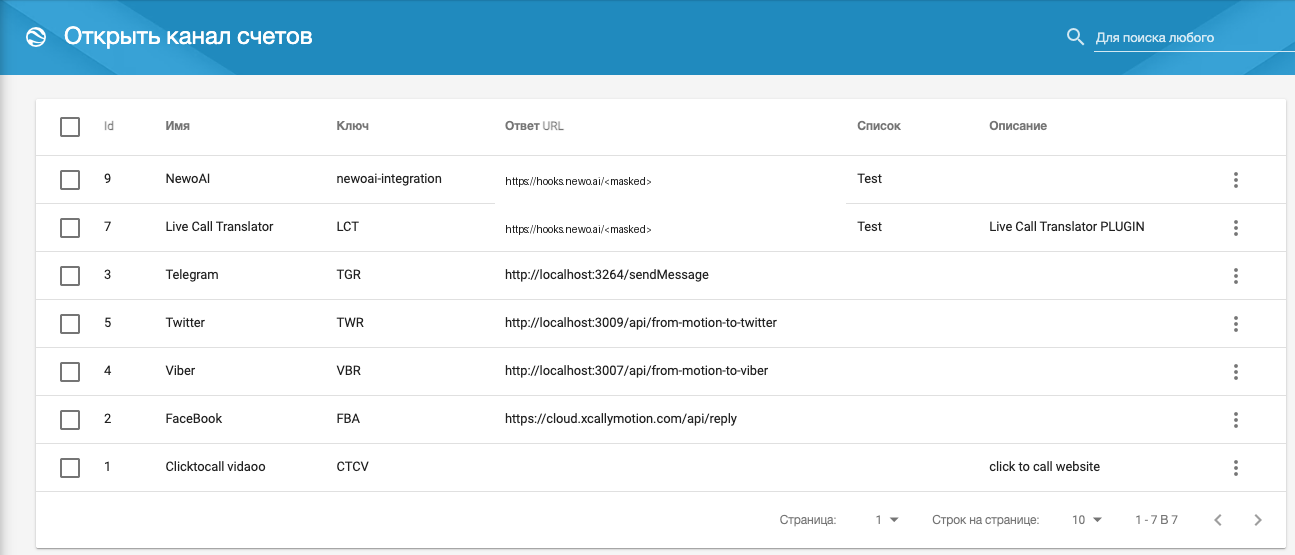
Open that account and verify:
Reply URLpoints tohttps://hooks.newo.ai/...Listis the expected contact list- account key matches the Newo project you are testing
Check XCALLY Agent Side
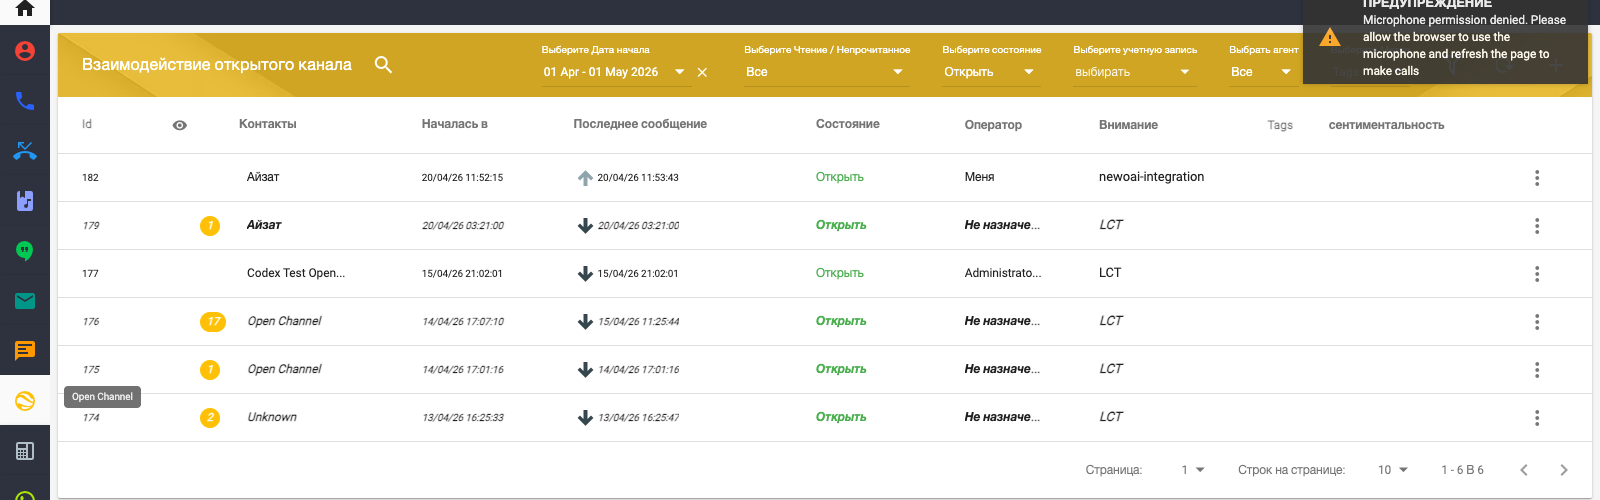
Open XCALLY agent UI.
Login as the test agent.
Make sure the agent is online.
Open:
Open Channel Interactions
Set filters so they do not hide new interactions:
| Filter | Safe Value |
|---|---|
| Date | Today or current test range |
| Status | Open |
| Account | Correct Open Channel account or All |
| Agent | Correct test agent or All |
| Read / Unread | All |
If the table is empty before testing, that is okay.
How to Test
Basic Handoff Test
- Open the
xcally_proxy_chatNewo chat widget - Ask for a live operator
- Confirm the handoff
- Verify that a new interaction appears in XCALLY
- Reply from the XCALLY operator UI
- Verify that the reply appears back in the
xcally_proxy_chatwidget
Expected result:
- The user stays in the same
xcally_proxy_chatchat - XCALLY receives the interaction
- Operator replies return through
replyUri